
Chairside Workflow for the MARPE Bonding Appointment:
Staff Roles
Instrument Setup, and Verification Checklist
A reproducible, checklist-anchored protocol for orthodontists delivering MARPE — covering tray sequencing, staff assignments, and post-bond activation verification.
TL;DR The MARPE bonding appointment workflow demands deliberate staff role assignment, pre-sequenced instrument trays, and a step-by-step verification checklist to prevent bonding failures. Precise groove dimensions, screw calibration, and post-bond activation confirmation are non-negotiable checkpoints. A structured chairside workflow reduces chair time and procedural errors across every rapid palatal expansion case.
A poorly staged MARPE bonding appointment is one of the most avoidable sources of clinical inefficiency in a skeletal expansion practice. When instruments are unsequenced, staff roles undefined, and activation steps unverified before dismissal, chair time climbs and errors compound. Dr. Mark Radzhabov at ortodontmark.com has built a protocol-driven approach to the chairside workflow for the MARPE bonding appointment, drawing on peer-reviewed mechanical data and prospective clinical trial evidence. This article gives orthodontists a reproducible, checklist-anchored framework covering tray preparation, staff assignments, bonding verification, and first-turn activation confirmation.
What Does a Verified MARPE Bonding Appointment
Actually
Look Like from Start to Finish?
The MARPE bonding appointment workflow is the sequenced set of staff roles, instrument preparations, and verification checkpoints that governs appliance delivery from tray setup through first-activation confirmation. Unlike a standard banding visit, this appointment demands that every team member knows their lane before the patient reclines, because the mechanical tolerances of a bone-borne expander leave no margin for improvisation mid-procedure. The appointment divides cleanly into three phases: pre-seating preparation, intraoral delivery and bonding, and post-bond verification including the first activation turn. Each phase has a designated lead and a corresponding instrument cluster. Mixing phases — or allowing instruments from a later phase onto the tray prematurely — slows the assistant and increases contamination risk at the adhesive stage, which is the highest-sensitivity step in the entire visit. For clinicians building or auditing this protocol, a useful anchor is the miniscrew-assisted rapid palatal expansion protocol described in peer-reviewed literature, where standardized activation sequences and bonding criteria are treated as distinct clinical events rather than a single undifferentiated procedure. Framing the appointment that way lets you assign accountability at each phase transition rather than correcting errors after the patient leaves the chair.
How Should the Instrument Tray Be Sequenced
Before
the Patient Enters the Operatory?
Instrument sequencing for the MARPE bonding appointment is not simply a matter of aesthetics — it directly controls the speed and sterility of each phase transition. The tray should be laid out in strict left-to-right procedural order: isolation and retraction first, followed by try-in instruments, then bonding materials, then activation keys. Any instrument needed for post-bond verification should sit on a separate secondary tray and not be introduced until phase 2 is complete. Band selection at the premolar and molar positions requires specific groove-fit instruments. Mechanical testing data from Camporesi et al. (2013) documented that tooth grooves for screw arm placement measured 1.5 mm wide × 4.0 mm deep at premolars and 1.5 mm wide × 3.5 mm deep at molars, confirming that the premolar groove is deeper than the molar groove and that band-seating force distribution differs accordingly. Having the wrong band gauge on the tray for a given arch morphology is a recoverable error only if the assistant catches it during try-in, not after cement introduction. For rapid palatal expander bonding mechanics, screw selection is equally instrument-dependent. Camporesi et al. (2013) showed that Hyrax and A2620 screws generated forces exceeding 20 kg at full activation, while Palatal Split screws reached approximately 16 kg. These force differences mean the activation key and torque-verification instrument on the tray must match the specific screw selected for that patient. Mixing activation keys across screw families is a protocol failure that typically presents as stripped drive sockets at the first activation attempt.
Which Staff Member Owns Each Step During
Appliance Delivery
and Why Does It Matter for Bonding Accuracy?
Staff role assignment during the MARPE bonding appointment should be documented in a written chairside protocol, not negotiated verbally at each visit. Three distinct roles are needed: the orthodontist as primary operator, the clinical assistant as moisture-control and material-handoff lead, and a second assistant or treatment coordinator as documentation and checklist auditor. In practices with only one chairside assistant, the documentation role defaults to the orthodontist at defined phase transitions. The clinical assistant's most critical micro-task is the adhesive handoff sequence. The assistant primes the surface, passes etchant, times the etch, passes primer, and passes adhesive in strict order — all without breaking moisture isolation. Any contamination between etch and bond extends chair time and risks a remount. This handoff sequence should be rehearsed outside of patient-occupied time, particularly when onboarding a new assistant to skeletal expansion appointments. The documentation auditor runs a parallel checklist that is independent of the operator's tactile focus. During the bonding phase, this person confirms band identity, records cement batch number, and notes the time of first activation. This is the staff member who catches the substituted screw or the missed activation step. Their checklist feeds directly into the post-bond verification record, which becomes the baseline against which all subsequent expansion turns are tracked. Efficient orthodontic staff coordination at this level is what separates a smooth MARPE delivery from a remount appointment two weeks later.
How Do You Verify Screw Activation Is Calibrated Correctly
Before
the Patient Leaves the Chair?
Activation verification is the most consequential checkpoint in the bonding appointment because every subsequent turn delivered by the patient at home is counted against the baseline set at this visit. Camporesi et al. (2013) established that one complete screw turn delivers 0.8 mm of expansion, calculated as four quarter-turns of 0.2 mm each, across all three expansion screw families tested. A single miscounted baseline turn therefore introduces a 0.2 mm error that accumulates with every subsequent activation and is not detectable without repeat imaging. The verification sequence begins with a visual inspection of the screw body before bonding: the drive socket must be unobstructed, the screw threads clean, and the arm terminations properly seated in their tooth grooves. After cement sets and before the patient is upright, the operator performs the first activation turn under direct vision with the overhead light fully directed at the screw body. The assistant counts aloud as each quarter-turn clicks, and the documentation auditor records the count independently. For clinicians establishing or refining their chairside MARPE setup, the activation calibration step also validates that the appliance has not shifted during cement polymerization. Any binding or asymmetric resistance during the first turn is a red flag for appliance distortion or an incompletely set cement joint and warrants immediate inspection before the patient is dismissed. Catching this at chair versus at a follow-up visit preserves both treatment efficiency and the patient's confidence in the appliance. Camporesi et al. (2013) tested all three screw types at 10 mm standard size, meaning any deviation from that dimension in the delivered appliance should be flagged against the lab prescription before the appointment begins.
What Should the MARPE Bonding Verification Checklist
Include
to Protect Against Post-Delivery Failures?
A written bonding verification checklist converts the three-phase workflow into an auditable record. The checklist is not a memory aid for experienced operators — it is a system that eliminates variability regardless of who is in the chair. Each item should be binary: completed or not, with no partial-credit entries. The checklist lives in the patient chart and is reviewed at the first activation follow-up to confirm continuity between the delivery appointment and home activation. The checklist should contain at minimum: appliance identity confirmed against lab prescription. Screw type and size verified (Camporesi et al. (2013) standardized testing at 10 mm). Groove fit confirmed at premolars and molars using the documented dimensions of 1.5 mm width at both sites per Camporesi et al. (2013). Cement batch and lot recorded. Isolation maintained throughout bonding phase. First activation turn performed and counted. Baseline activation number documented. Patient and guardian activation instructions reviewed verbally. And appliance photograph taken before dismissal. A prospective randomized clinical trial by Chun et al. (2022) enrolled 20 patients per group with the same expansion target of 35 turns, underscoring that activation-count accuracy from the bonding visit forward is inseparable from the clinical outcome data those trials generate. If a practice's bonding verification checklist cannot reproduce the activation-count accuracy of a controlled trial, the expansion outcome becomes ungoverned. Connecting the chairside checklist to the published evidence base — rather than treating it as an administrative formality — is the conceptual shift that makes the checklist clinically meaningful.
Free Clinical Guide
Which Expansion Appliance at Which Age?
Get Dr. Mark Radzhabov's guide to skeletal-expansion appliances — indications, pros & cons, and how to choose by patient age. Free to your inbox.
Prefer video? Watch the free demo lesson on MARPE appliance types, features and trade-offs.
Documented outcomes
Clinical cases from Dr. Mark Radzhabov's practice
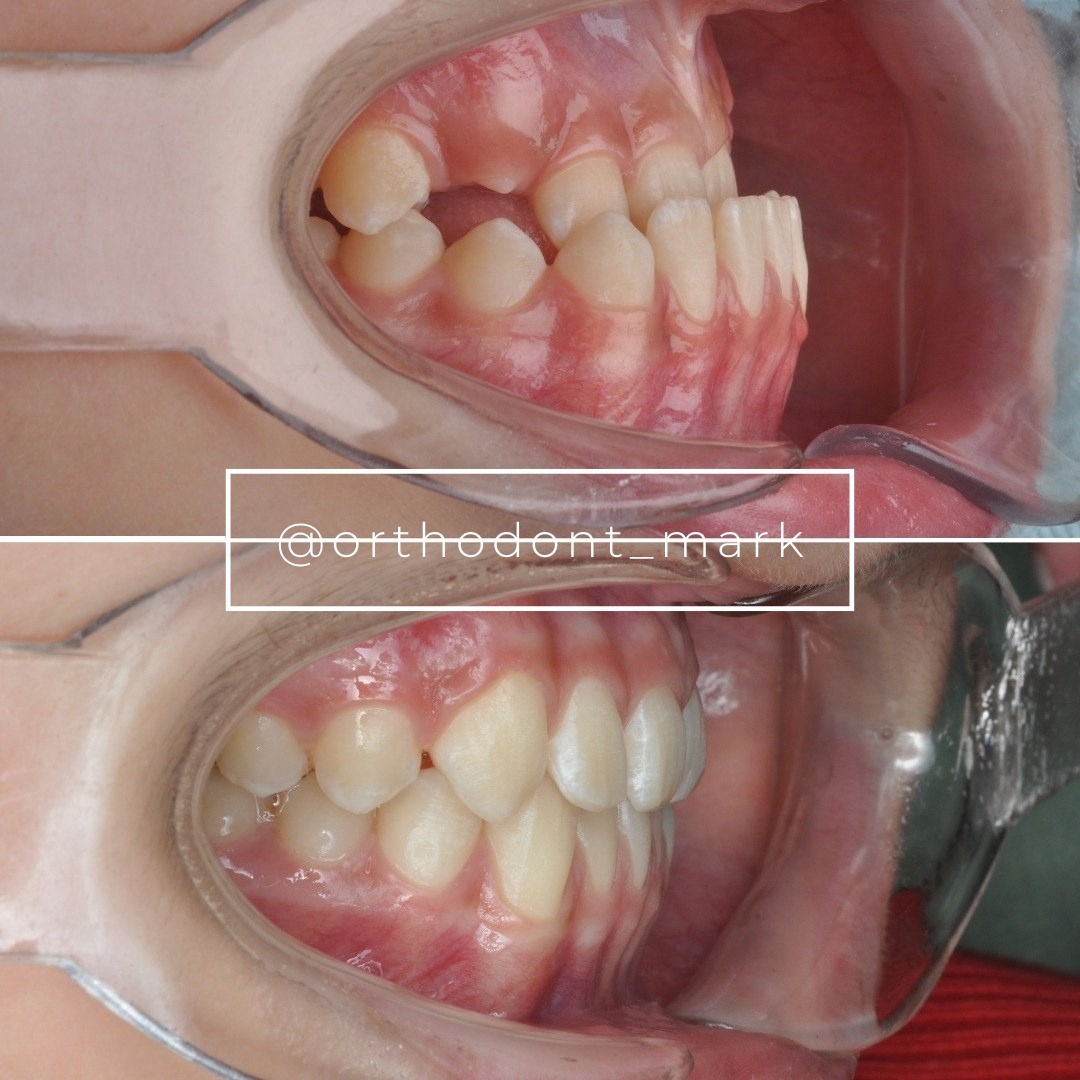
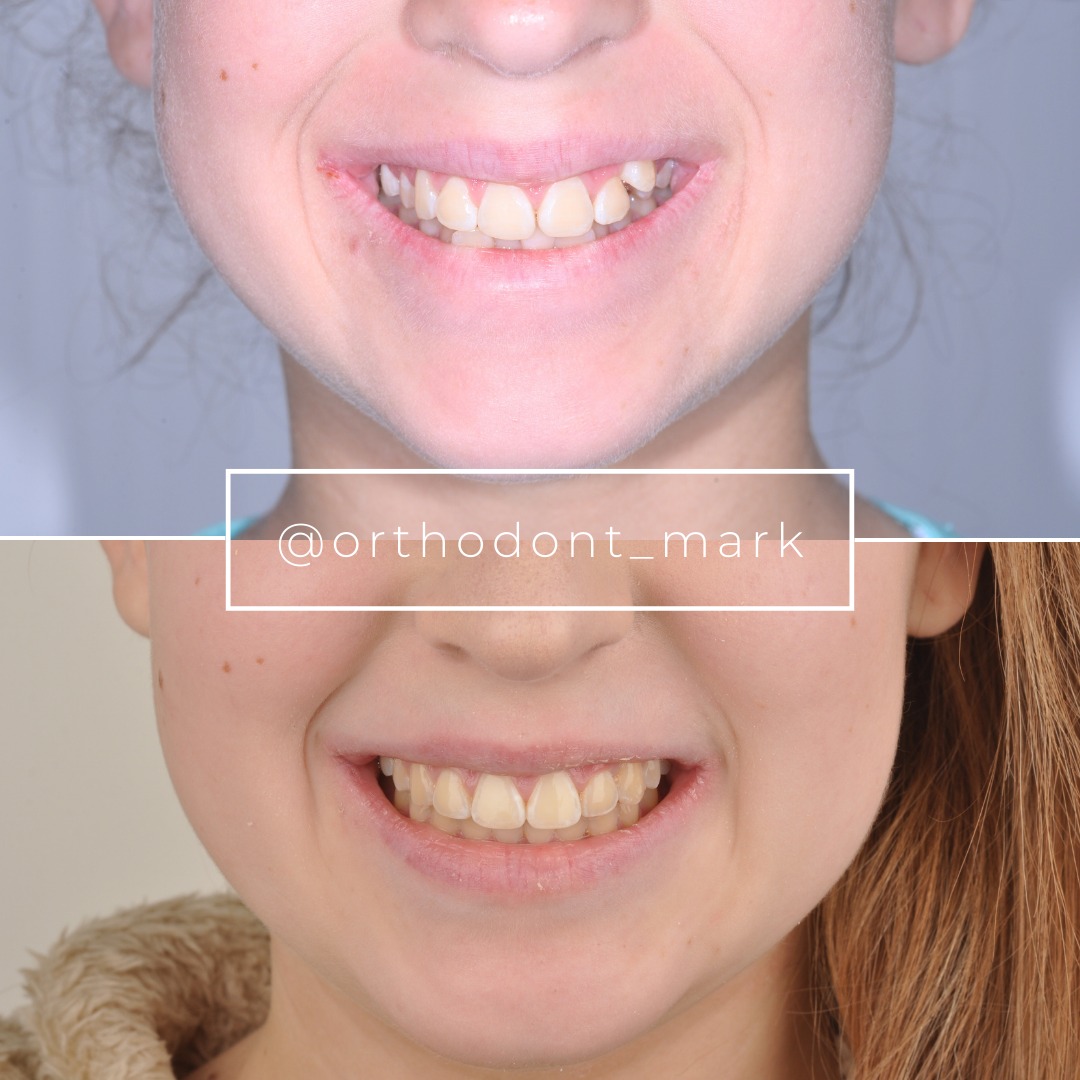
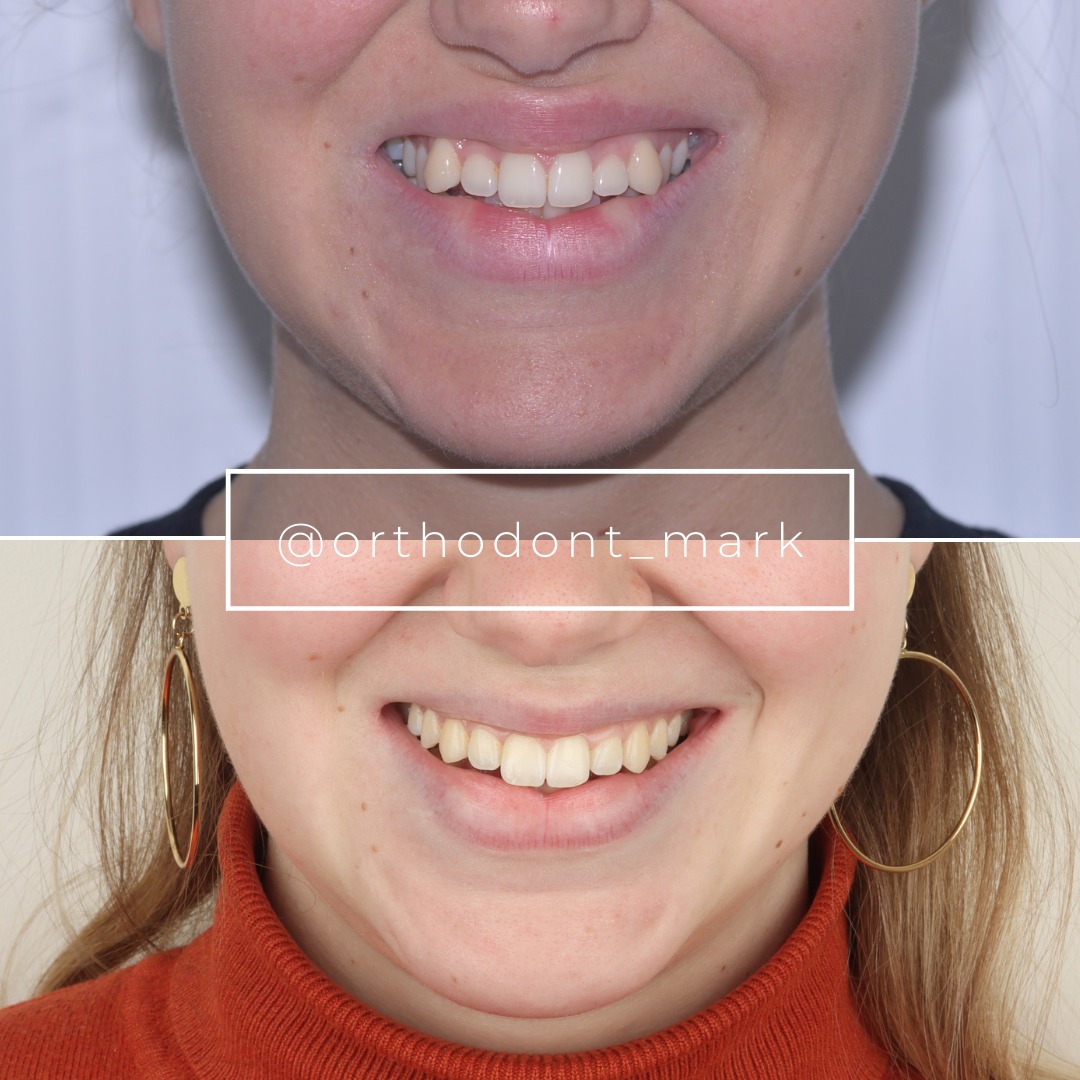
Learn the full MARPE protocol from Dr. Mark Radzhabov
Fundamental course covering CBCT patient selection, miniscrew planning, activation protocols, and 60+ clinical cases. Choose the access level that fits your practice.
Essentials of rapid palatal expansion for practicing orthodontists.
- Core RPE concepts and biomechanics
- 6 structured video lessons
- Clinical decision checklists
- Lifetime access to recordings
Deep-dive into MARPE protocol, diagnostics, and clinical execution.
- 6 modules covering MARPE from A to Z
- CBCT case selection walkthroughs
- Miniscrew placement and activation
- 60+ annotated clinical cases
- Direct Q&A with Dr. Mark Radzhabov
5-element medical consultation framework for dentists and orthodontists.
- Trust-building consultation protocol
- 5 lesson modules
- Templates for treatment plan delivery
- Works with any clinical specialty
Clinical FAQ
How should I assign staff roles during the MARPE bonding appointment to prevent cement contamination?
Assign three roles: the orthodontist as primary operator, the clinical assistant managing moisture control and adhesive handoff, and a documentation auditor running the verification checklist independently. Separating tactile and documentation responsibilities prevents the operator from losing isolation focus during the critical bonding phase.
What instrument tray layout minimizes chair time for a MARPE bonding appointment?
Sequence instruments left-to-right by procedural phase: isolation and retraction first, then try-in tools, then bonding materials, then activation keys on a separate secondary tray. Activation instruments should not appear on the primary tray until bonding is complete and cement has set.
How do groove dimensions at premolars versus molars affect band seating during MARPE delivery?
Per Camporesi et al. (2013), premolar grooves measure 1.5 mm wide × 4.0 mm deep while molar grooves measure 1.5 mm wide × 3.5 mm deep. The deeper premolar groove changes the seating force vector, so band gauges and seating instruments should be selected and staged separately for each tooth position.
What is the expansion per quarter-turn for standard MARPE screws, and how does this affect activation documentation?
Camporesi et al. (2013) established that one complete turn delivers 0.8 mm of expansion, calculated as four quarter-turns of 0.2 mm each. A single miscounted quarter-turn at the bonding appointment introduces a 0.2 mm baseline error that accumulates across every subsequent home activation.
How do force outputs differ between Hyrax and Palatal Split screws, and how should that influence chairside screw verification?
Camporesi et al. (2013) found Hyrax and A2620 screws exceeded 20 kg of force while Palatal Split screws reached approximately 16 kg. Because force profiles differ, the activation key on the tray must match the specific screw type delivered — using a mismatched key risks stripped drive sockets at first activation.
What checklist items are non-negotiable before dismissing a patient after MARPE bonding?
At minimum: appliance identity confirmed, groove fit verified at premolars and molars, first activation turn performed and counted with dual documentation, cement batch recorded, verbal activation instructions reviewed with patient or guardian, and an intraoral photograph archived as the baseline record.
How does a standardized activation total inform the bonding appointment checklist?
Chun et al. (2022) used a fixed 35-turn expansion target in a prospective randomized trial. Achieving that total accurately depends entirely on a correct baseline count established at the bonding appointment — making first-turn documentation at delivery the single most consequential chairside record in the case.
What are the signs of appliance distortion that should be caught during post-bond verification before dismissal?
Binding or asymmetric resistance during the first activation turn after cement sets indicates possible appliance distortion or incomplete polymerization. Any non-uniform quarter-turn resistance warrants inspection under magnification and resolution at the chair, not deferred to the two-week follow-up.
How should a practice train a new assistant to manage the MARPE bonding appointment workflow?
Role assignments and the handoff sequence — etchant, primer, adhesive, activation key — should be rehearsed off-chair before the assistant joins a live MARPE delivery. A written checklist with binary completion fields gives the new team member a structured reference independent of verbal reminders.
How does efficient staff coordination during MARPE appliance bonding reduce remount appointments?
A parallel documentation auditor catches screw misidentification, missed activation steps, and unseated bands independently of the operator's tactile focus. Resolving these at the bonding visit rather than at a remount appointment protects both treatment efficiency and the patient's confidence in the appliance.
A disciplined chairside workflow for the MARPE bonding appointment is not an administrative convenience — it is a clinical safeguard that protects against misbonded bands, uncalibrated screws, and unverified activation at the most mechanically critical visit in the expansion sequence. Every step from tray layout to post-bond activation check should be assigned, rehearsed, and signed off. Dr. Mark Radzhabov's structured approach to MARPE delivery is available through dedicated training at ortodontmark.com, where clinicians can map this checklist to their own team and patient mix. Key sources: Camporesi et al. (2013), BioMedical Engineering OnLine, doi:http://www.biomedical-engineering-online.com/content/12/1/128. Chun et al. (2022), BMC Oral Health, doi:10.1186/s12903–022-02138-w.